A Strong Foundation: The Basics of Hobby Horse Construction
Hobby horsing is a delightful blend of imagination and creativity. It allows individuals to create their own unique horse companions, fostering a sense of belonging to a community that values artistry and play. But before galloping off into the world of hobby horsing, understanding the basics of construction is essential. Proper construction techniques not only ensure that your hobby horse lasts but also enhances the joy of riding it. Let’s embark on this exciting journey to learn how to create a remarkable hobby horse from scratch!
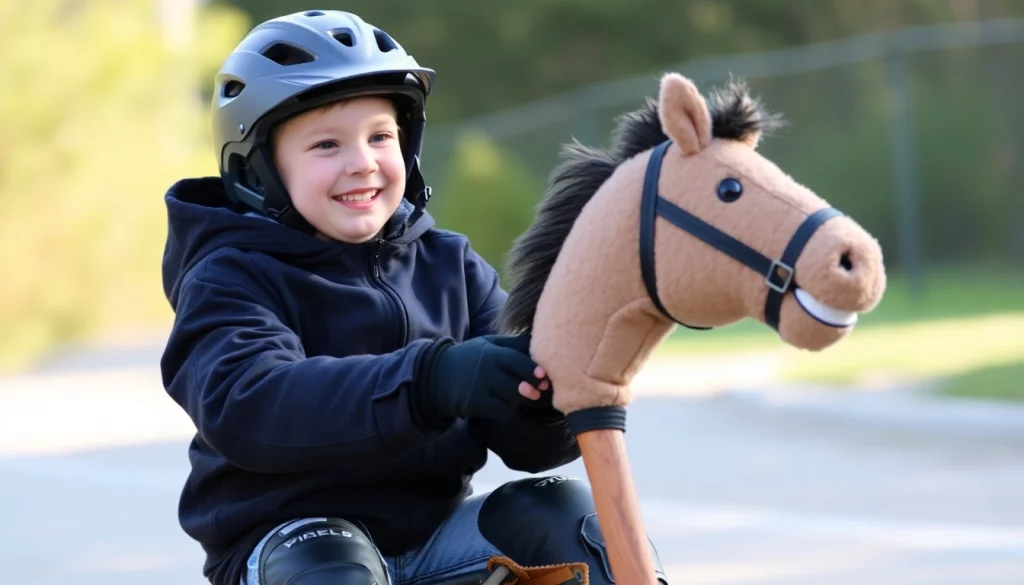
The Anatomy of a Hobby Horse: Key Components to Consider
Every hobby horse is made up of several important parts. Understanding these components is crucial for successful construction.
- Head: The head is the most recognizable part of the hobby horse. It sets the character and personality of your creation.
- Body: The body provides the necessary strength and frame to support the horse.
- Legs: Legs must be sturdy yet lightweight, allowing for balance while riding.
- Rein Mechanism: This feature allows riders to steer their horses, adding to the authenticity of the experience.
Each part plays a significant role in the overall functionality and aesthetics of the hobby horse. Proper understanding and construction of these components will lead to a delightful and effective finished product.
Materials Matter: Choosing the Right Fabrics and Fills
The materials used for constructing a hobby horse can greatly influence its look, feel, and durability. Here are some common materials and their respective pros and cons:
- Fleece: Soft and easy to work with, fleece is a popular choice for covering the head. It gives a cuddly appearance.
- Felt: This fabric is sturdy and comes in various colors, making it ideal for creating vibrant designs.
- Cotton: Lightweight and breathable, cotton is excellent for the body but may require additional reinforcement.
- Stuffing: Polyester fiberfill is commonly used for padding, offering a soft yet resilient feel.
Choosing the right materials not only enhances the look of your hobby horse but also contributes to its functionality and longevity. Visit our [material selection guide](https://example.com/material-selection) for more details.
Tools of the Trade: What You’ll Need for DIY Hobby Horse Building
Before diving into construction, gathering the right tools is essential. Here’s a list to get you started:
- Scissors: For cutting fabric and other materials.
- Sewing machine: A must-have for stitching together various components.
- Needles and thread: Essential for hand-sewing details.
- Fabric glue: Great for quick fixes and securing parts that may not need stitching.
- Marker or chalk: Useful for marking cutting lines on fabric.
Having these tools on hand will make your construction process smoother and more enjoyable. For a more comprehensive list of required equipment, check out our [required equipment page](https://example.com/required-equipment).
Step-by-Step Construction Guide: Bringing Your Hobby Horse to Life
Now that you’re equipped with knowledge and tools, it’s time to bring your hobby horse to life! Follow this step-by-step guide to ensure a successful build.
Head Start: Crafting the Perfect Hobby Horse Head
The head is where your hobby horse’s character shines. Here’s how to create it:
1. **Shape the Head:** Start with a base shape using sturdy materials like cardboard or foam. This will provide structure.
2. **Add Features:** Use felt or fleece to create eyes, ears, and a mane. Secure these with fabric glue or stitches.
3. **Stabilize:** Ensure that the head is balanced and securely attached to the body. Test it by gently shaking to check for any wobbling.
By taking your time on the head, you’re laying a strong foundation for the overall aesthetic of the horse.
Body Basics: Assembling the Main Frame
Creating the body involves a few key steps:
1. **Frame Construction:** Use lightweight wood or strong cardboard to create the framework of the body. This keeps it durable yet easy to handle.
2. **Covering the Frame:** Attach your chosen fabric, ensuring that it fits snugly. This can involve sewing or gluing, depending on your preference.
3. **Adding Padding:** Insert stuffing to give the horse a fuller appearance, making it more inviting to ride.
A well-constructed body not only adds to the horse’s charm but also ensures that it can withstand the rigors of play.
Leg Work: Attaching Legs Securely
Legs are critical for stability and movement. Here’s how to attach them securely:
1. **Choose the Material:** Whether you opt for fabric or other materials, make sure they are strong enough to support the horse’s weight.
2. **Attachment Method:** Use a combination of stitching and glue to secure the legs onto the body. Ensure they are evenly placed for balance.
3. **Testing Mobility:** Once attached, gently test each leg’s movement to ensure they can handle the action of riding without coming loose.
This step is vital for maintaining a sturdy and enjoyable hobby horse experience.
Finishing Touches: Customization Options for Your Hobby Horse
Once your horse is constructed, it’s time to make it truly yours! Customization adds a personal touch that reflects your style and creativity.
Accessorizing Your Steed: Fun Add-ons and Extras
Consider adding accessories like:
- Saddles: Create or buy a saddle that matches the color scheme of your horse.
- Bridles: A simple bridle adds realism to your creation.
- Decorative Elements: Use ribbons, beads, or other embellishments to give your horse character.
Personalizing your hobby horse enhances the joy of crafting and riding.
Avoiding Common Construction Pitfalls: What Not to Do
Even experienced builders can face challenges. Here are common mistakes to avoid:
- Skipping measurements: Always measure twice to ensure everything fits perfectly.
- Using inadequate materials: Avoid flimsy fabrics that won’t hold up during play.
- Rushing the process: Take your time to ensure every part is constructed well.
By being aware of these pitfalls, you can build a hobby horse that stands the test of time.
Gallop Off in Style: Showcasing Your Creation
Once your horse is complete, it’s time to show it off! There are many ways to celebrate your hard work.
Join the Community: Sharing Your Work in Hobby Horsing Circles
Connect with fellow enthusiasts by sharing your creation online or in local hobby horsing groups. Social media platforms are great for showcasing your work. Consider joining groups dedicated to hobby horsing and participating in events. Engaging with the community can inspire new ideas and provide valuable feedback.
Let your creativity shine and inspire others to take up this wonderful hobby!
Ready, Set, Ride! Final Thoughts on Crafting Your Dream Hobby Horse
Creating your own hobby horse can be a rewarding experience. It’s about more than just constructing a toy; it’s about exploring your creativity, building confidence, and connecting with a vibrant community. So gather your materials, choose your colors, and let your imagination run wild. Your dream hobby horse awaits!
Neigh-sayers Will Be Silenced: Your New Hobby Awaits!
Don’t let anyone hold you back. Dive into this enchanting world of hobby horsing, and you’ll find a community ready to welcome you. Happy crafting!